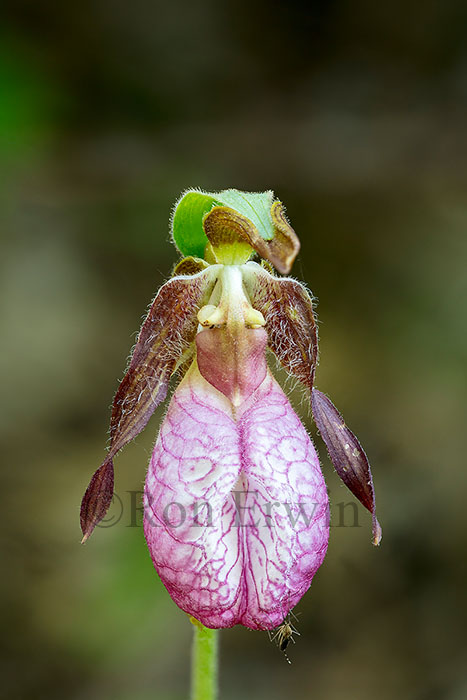
Sometimes one photograph will not provide enough depth of field. Image stacking is a technique that involves taking several images and focusing on different parts of the subject. I have been using this technique for a few years now. The images are put together in Photoshop by using Auto Blend. This allows me to increase the depth of field dramatically. The following image was made from seven images stacked for increased depth of field:

Pink Lady's Slipper (image stacking)
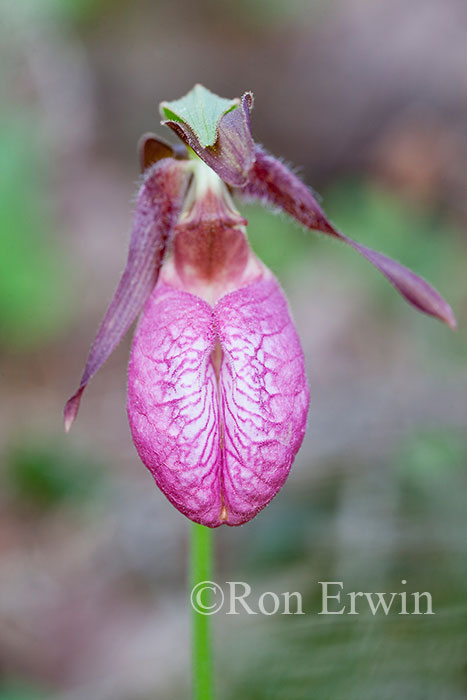
For comparison, the image below is is a single image shot at f8. You can see that the depth of field is much more limited.

Pink Lady's Slipper (one focus point/one image)
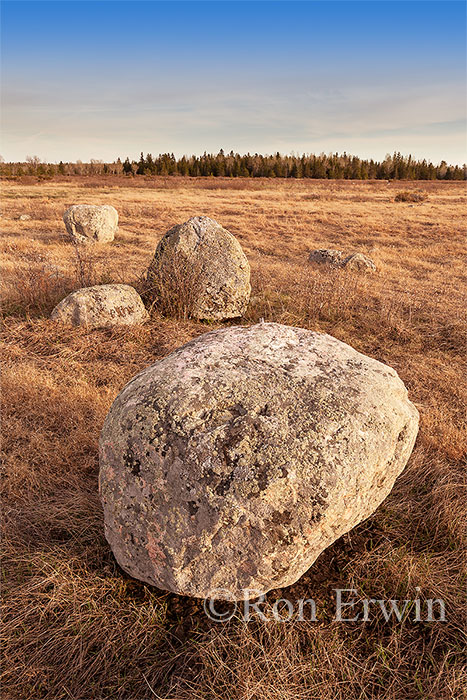
It is quite simple for a landscape image. I often only need 2 or 3 images to achieve maximum depth of field.

Erratic Rocks (image stacking)
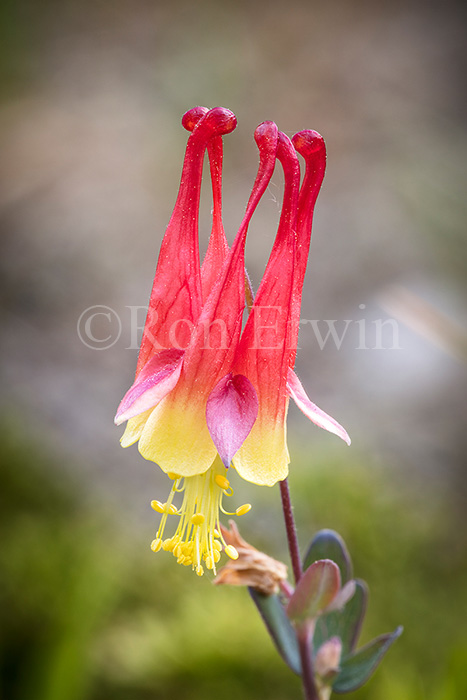
For macro work, it often requires many more images:

Wild Columbine (image stacking)
Your photo subject needs to be motionless. I use a sturdy tripod and work on windless days. For flowers, I only want the parts of the flower in focus. I leave the background soft so it has a very natural look. Live view is the best way to focus. Switch to manual focus and zoom into 10X in live view. I use a remote to trigger the camera and often use mirror lockup. Most lenses have a particular aperture that is the sharpest. It is usually 2-3 stops down from wide open. If I’m only taking one image of a flower, I need to work at f22 or f32 to achieve the depth of field needed to have all of the parts of the flower sharp. This is not the optimum aperture. By stacking images, I can work at f8 or f11. This gives a much sharper image at the focus point.
If you use Lightroom, select and process the raw images. Then go to the menu Photo>Edit In>Open as Layers in Photoshop. If using Bridge, select and open in Adobe Camera Raw. Adjust all of the images and click Done. Then go to Tools>Photoshop>Load Files into Photoshop layers.
Once you have the images as layers, in Photoshop go to Edit>Auto-Align Layers. Then Edit>Auto-Blend Layers. There are sometimes little lines on the image at less than 100% view. If you zoom into 100% and still see areas that need editing, put a blank layer on top and use the spot healing brush with sample all layers turned on to fix up any blemishes.
Labels: auto blend layers, erratic rocks, focus points, image stacking, layers, Manitoulin Island, Pink Lady's Slippers, wild columbine
